We’ve all been there, trapped in a frustrating chatbot loop, shouting “agent!” at our screens. Your customers wait on hold while support agents spend fifteen minutes repeating the same repetitive tasks on each ticket. Frustration builds on both sides.
Imagine being able to build AI agents that take pressure off your support team from day one. A virtual assistant that instantly manages 80% of common queries instantly, 24/7.
No queues. No frustration. Just quick, accurate solutions.
Modern AI agents make this possible. Unlike rigid chatbots, they learn from your help articles and FAQs. They connect to your tools to perform real tasks updating orders, resetting passwords, and more.
So, how do you build AI agents that actually work? Let’s break it down step by step.
Why should businesses use AI agents for customer support?
Customer support teams often face an overwhelming volume of repetitive questions, leading to higher costs and longer wait times.
Traditional chatbots once seemed like the answer, but their rigid workflows and limited adaptability caused frustration for 80% of consumers (UJET).
Customers now expect dynamic, personalized support something static bots simply can’t provide.
AI agents change this by moving beyond scripted responses to deliver intelligent, contextual support that genuinely delights customers.
Here’s why businesses are adopting them now:
- Deliver instant, accurate responses by understanding customer intent and pulling from relevant knowledge.
- Automate repetitive tasks, lowering operational costs and freeing human agents for complex conversations.
- Enhance customer satisfaction through faster resolutions and personalized support experiences.
And the impact is real: 60% of companies using AI report higher customer satisfaction due to improved response speed and personalization (WifiTalents).
By combining deep understanding with real-time action, AI agents enable businesses to scale support efficiently without sacrificing quality.
7 Easy steps for building AI agents with BoldDesk
Creating a high-impact AI agent doesn’t require a PhD in machine learning. With the right AI agent builder, tools and strategy, anyone can deploy AI agents.
Here is a simplified roadmap on how you can build an AI agent from scratch with BoldDesk, for high-impact support.
Step 1: Enable AI features
Getting started with AI in BoldDesk is quick and easy, it’s the first step to automating repetitive tasks, reducing team workload, and delivering smarter, faster customer support.
Here’s how you can enable BoldDesk’s AI features:
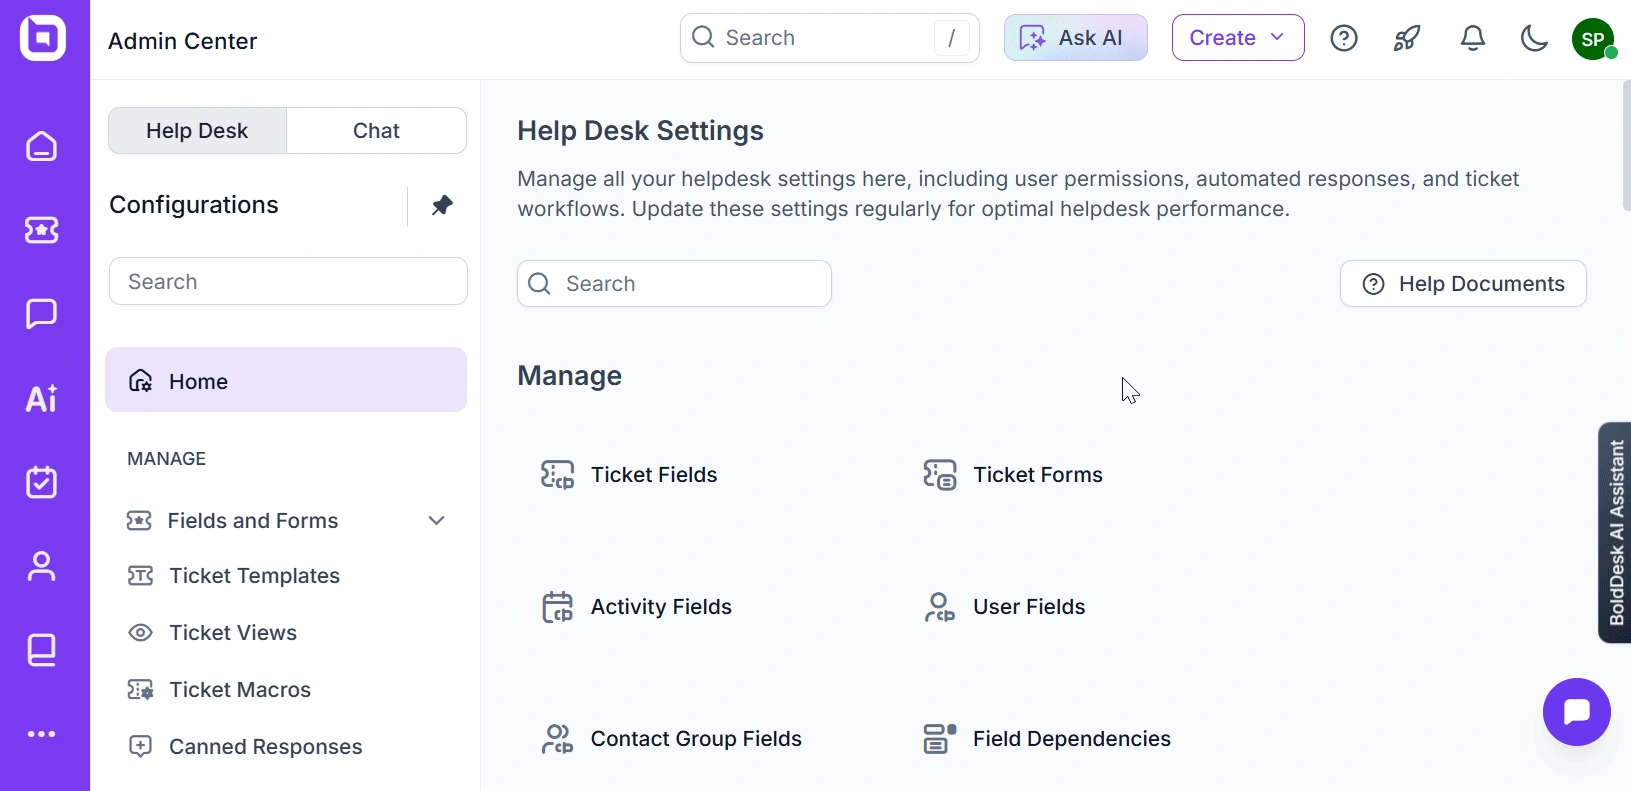
- Go to Admin settings in BoldDesk.
- Locate the Artificial Intelligence section.
- Review the list of available AI features.
- Turn on the AI Agent feature to start using AI tools.
Ensure your plan (Momentum or Enterprise) supports it. With these settings enabled, you’re ready to build an AI agent that automates everyday support tasks.
Step 2: Create a new AI Agent
Creating an AI agent takes just minutes and provides nonstop automation, solving problems without human intervention.
Follow these steps to create a new AI agent in BoldDesk:
- Go to the AI module and look for the option to create agent.
- Name your agent. Choose something descriptive like Billing Agent or Support Assistant.
- Select the brand and the communication channels for the agent, such as live chat, email, or WhatsApp.
- Define what your agent should do by setting up:
- Logic or types of questions and topics (intents) it will respond to.
- Examples: billing inquiries, password resets, or order tracking.
Refer to this video to learn how you can quickly get started with BoldDesk’s AI agent.
Pro tip:
Begin with just one AI agent focused on a specific area like billing or account access. Track how well it resolves issues over the first 30 days, then roll it out to other departments once it proves effective.
Step 3: Configure knowledge base and training
Assign the data sources the agent will use: FAQs, KB articles, PDFs, URLs. This foundation ensures you can build an AI agent that learns continuously to automates varied support workflows.
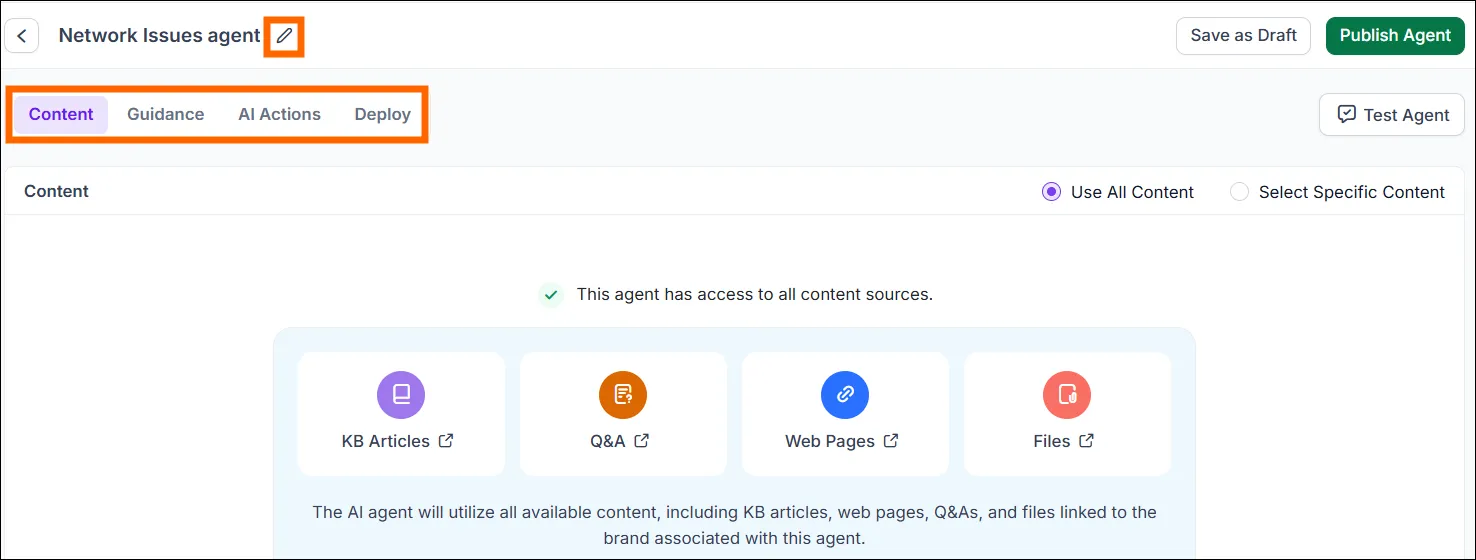
- Add custom intents or phrases if needed (for domain-specific tasks).
- Set fallback behavior: if the agent cannot confidently answer, it should escalate to human.
- Define tone, brand voice, language settings. When building AI agents, getting the personality right is key.
- If the agent will perform actions (via API) then ensure those actions are configured (see next section).
Step 4: Configure AI Actions (for backend tasks)
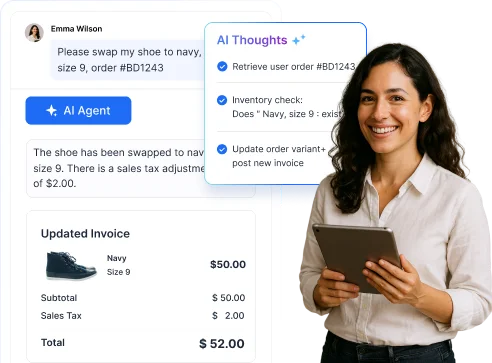
To make your AI customer service agent more than just a chatbot, you can add AI Actions. They let the AI agent perform real tasks like updating records or sending confirmations.
Here’s how:
- Go to the AI Actions section in Admin and click Create Action.
- Choose the type (API or MCP Server), then set a trigger. This can either be from the AI agent or AI Copilot.
- You’ll define what data to collect (like order ID or email), connect to your system using an API endpoint, and map the response so the agent knows what to say back.
- Test the API response in the sandbox, then publish the action.
For example:
A growing SaaS startup can enable an AI Action to automate subscription changes. When a user types “Cancel my subscription,” the AI Agent verifies the account, triggers the billing API, updates the record, and sends a confirmation, all in one seamless flow.
Step 5: Map the agent to a channel/widget
To make your AI Agent available to customers, you need to connect it to the right communication channels. This ensures it responds in context and automates replies effectively.
The supported channels include: Live chat, web widgets, social platforms like WhatsApp, Instagram, Facebook and messaging services such as Twilio, Telegram, Gupshup WhatsApp, and Line.
For website integration:
- Go to the Admin settings, open Web Widgets & AI Agent, and click Add Widget.
- Select the AI Agent you created.
- Embed the provided JavaScript snippet into your website or customer portal.
You can also effortlessly automate live chat responses and deliver instant support using our AI-powered help desk.
For other channels (e.g., WhatsApp, Telegram, Facebook): Set up the appropriate webhook or integration so the AI Agent can receive and respond to incoming messages.
Step 6: Quality testing before deployment to live
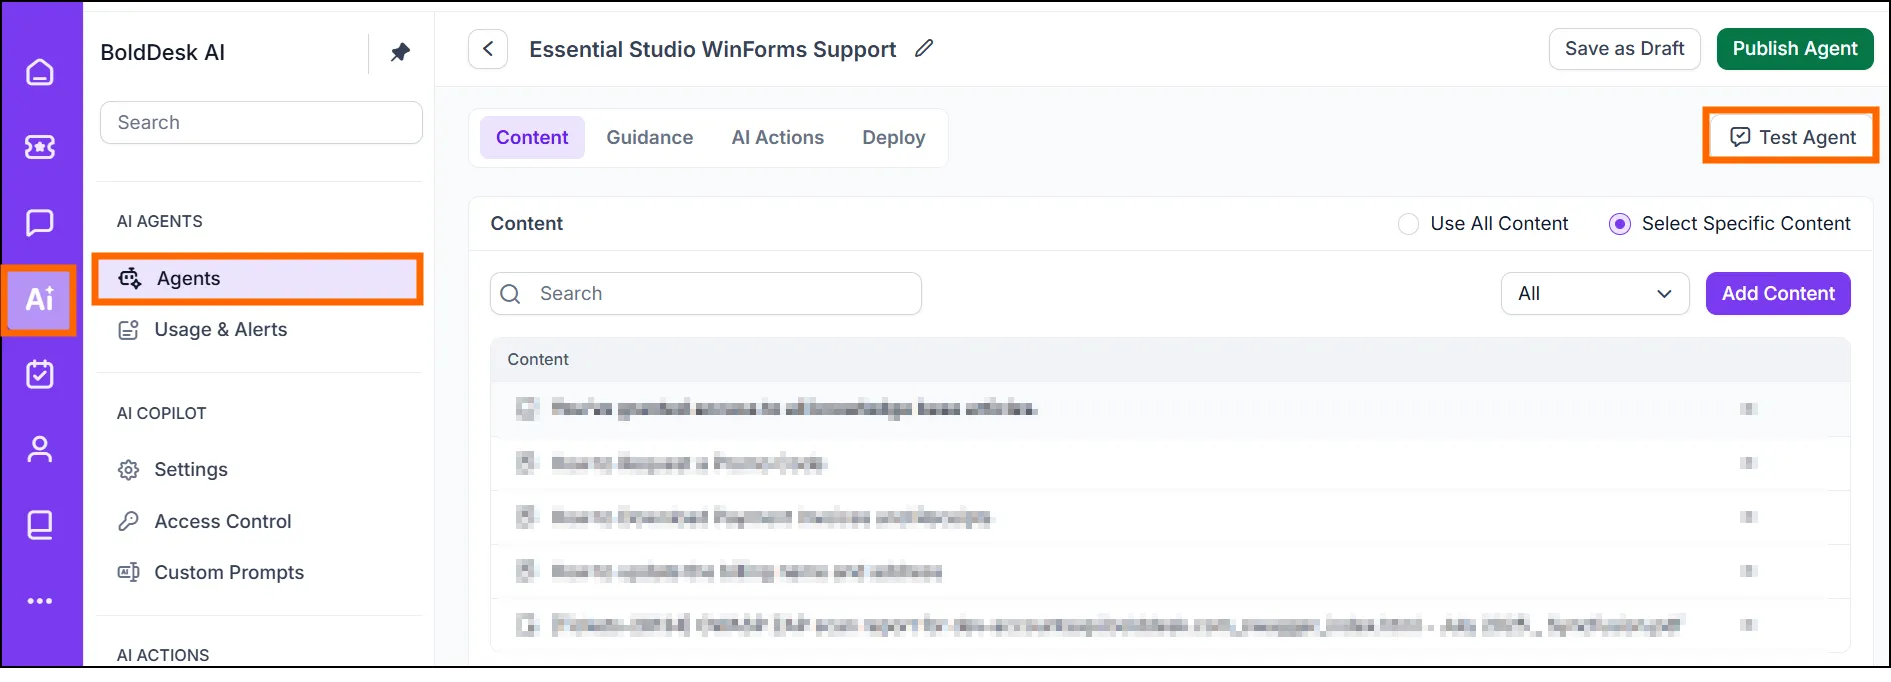
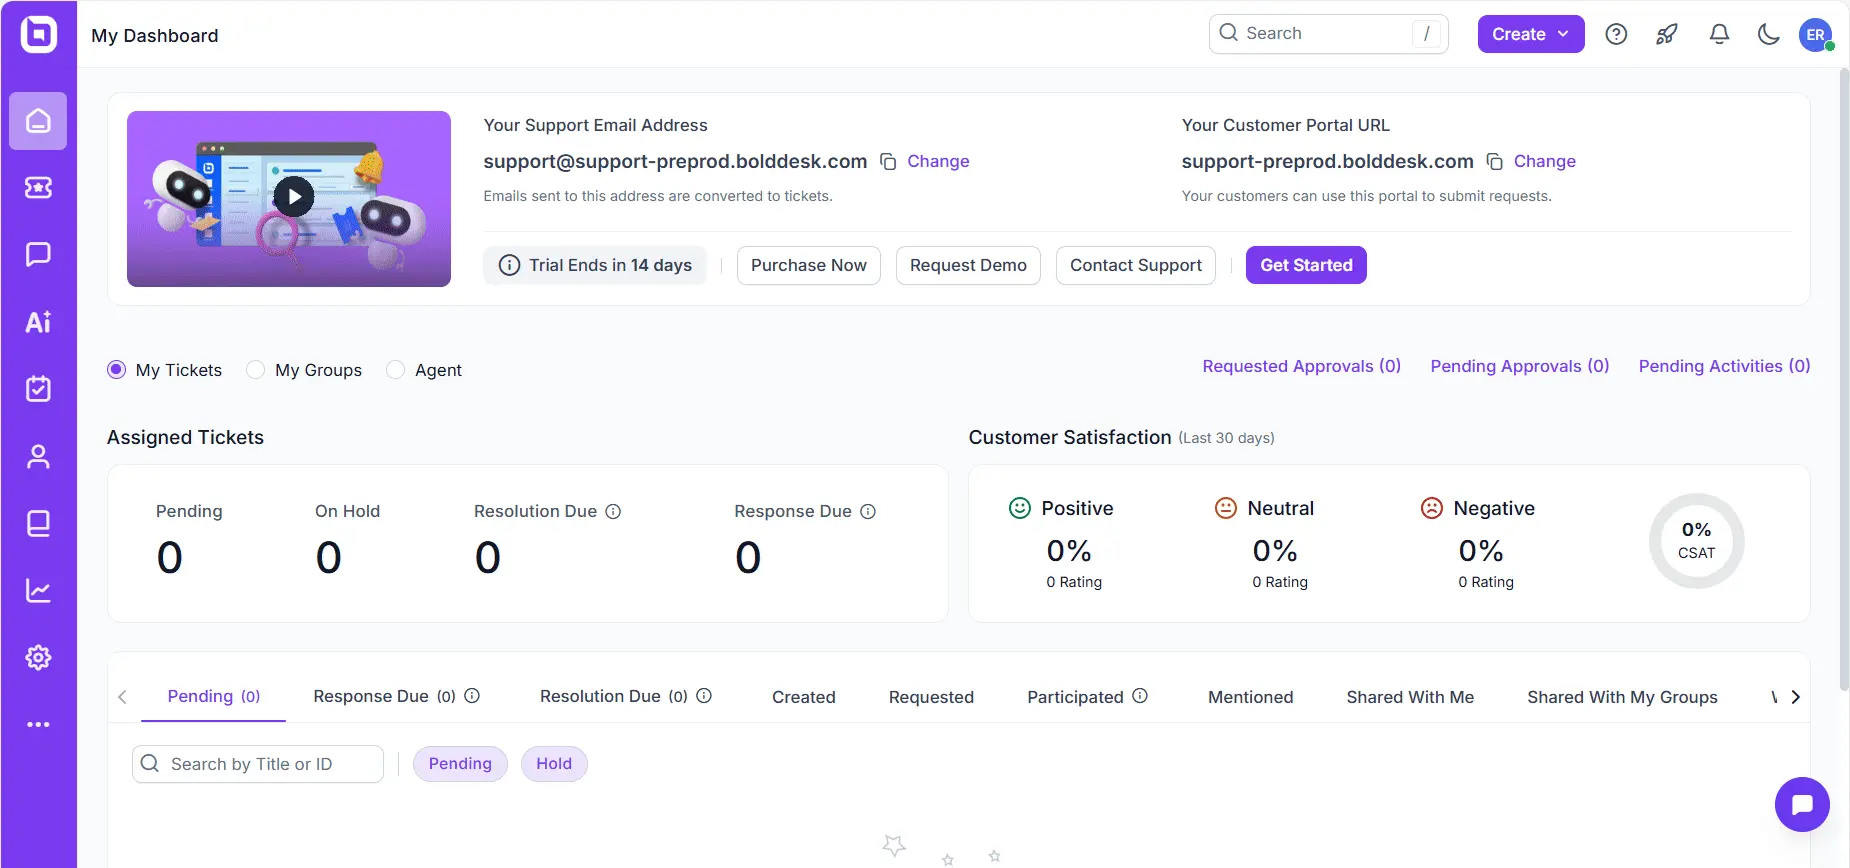
Before deploying your AI Agent, it’s essential to test its performance to ensure it responds accurately and handles tasks as expected. BoldDesk provides a built-in Test Agent interface to help with this.
To test the AI agent you have built:
- Use BoldDesk’s Test Agent feature in the AI module to simulate real conversations.
- Enter sample questions covering different topics and intents, and observe how the AI responds:
- Does it understand the topic?
- Provide the correct answer?
- Trigger the right AI action (if applicable)?
- Note any mistakes or misrouted responses. Refine the training data or logic, then retest until the agent performs reliably.
Thorough testing is the key to deploying AI agents with confidence.
Pro tip:
If you’ve created multiple agents for different roles (e.g., billing vs. technical support), test each one separately.
Make sure queries are routed to the right AI agent. For example, a “technical issue” should go to the technical agent, not the billing agent.
Step 7: Deployment to production
Once satisfied, publish the agent. Monitor closely in the first days:
- Check how many conversations were handled by the AI agent vs escalated.
- Monitor agent performance dashboard for errors or mis-classifications.
- Set escalation rules: If the AI agent fails, assign to human agent, send an apology e.g. “I’m transferring you to human”.
Still unsure how to build your first AI agent? Our always-on support team is here to guide you step by step.
How to create and manage multiple AI agents
Sometimes you might need to create AI agents at scale and learning how to manage AI agents effectively is key to keeping support operations running smoothly.
To build multiple AI agents in BoldDesk, follow these steps to optimize customer support and business operations:
- Create AI agents and assign roles: Set up multiple AI agents tailored to specific business functions such as billing, technical support, or onboarding. Customize each agent with unique content sources, tone, language, behavior settings, intent handling, and task execution logic.
- Map the build AI agents to channels: Assign each AI agent to specific communication channels like live chat, web widgets, or social media platforms to ensure contextual relevance to customer queries.
- Set permissions: Ensure you have the required permissions under admin roles, specifically ‘Manage AI Agents/Manage AI Actions,’ to manage AI agents effectively.
- Test AI multi-agents: Conduct quality assurance testing through simulation and refinement to ensure the multiple agents perform as expected.
- Edit, train and customize: Modify and customize each AI agent as needed. Use the ‘Deploy,’ ‘Publish,’ and ‘Save as Draft’ options to manage each agent’s operational status.
- Monitor performance: Track volume, resolution rate, response time, and CSAT per agent to gauge how each is performing well.
- Delete AI agents: If necessary, delete AI agents while ensuring operational efficiency, data retention, and reassignment of tasks to other agents.
Post-launch optimization and continuous improvement of AI agents
Building AI agents doesn’t stop after deployment. Here’s how to keep your AI agents productive and trusted.
- Feedback loops: Collect user feedback and review failed interactions to refine intents and actions.
- Knowledge base hygiene: Keep KB articles updated, use AI tools to enhance content, and tag by domain for relevance.
- Performance monitoring: Use dashboards to track resolution rates, response times, satisfaction, and escalation trends.
- Escalation handling: Ensure agents escalate when unsure, monitor for errors, and uphold security standards.
- Scaling strategy: Clone agents for new regions/products, maintain consistent training, and assign clear ownership.
Building AI customer service agents that shape the future
Building AI agents isn’t just a tech upgrade but also a strategic move. The right AI agent builder, like BoldDesk makes it easy to create and deploy AI agents for customer service without writing thousands of lines of code.
Whether you’re a startup founder, support manager, or developer, our platform helps you deliver smarter, faster, and more personalized support.
✅ Start your 15-day free trial and automate support tickets within 7 days.
✅ Book a 30-minute live demo, to explore advanced features with our experts.
✅ Take a product tour and experience autonomous AI agents firsthand.
✅ Cancel anytime, no contracts.
✅ No credit card required.
Related articles
- 8 Practical Ways to Use Generative AI in Customer Service
- How Agentic AI Is Transforming Customer Experience in 2025
- Autonomous AI Agents: A Smart Way to Deliver Excellent Support
Frequently Asked Questions
No. AI agents are designed to handle repetitive, low-value tasks so your human team can focus on complex, high-touch interactions. They complement not replace your support teams.
You can launch your first AI agent in under an hour. Simply upload your help articles, FAQs, and connect your tools no coding required.
Yes, AI agents excel at routine tasks and FAQs. For complex issues, they seamlessly escalate to human agents, ensuring customers always get the right support.


 Email Ticketing System
 Shared Inbox Software
 Multi Brand Help Desk
 Internal Help Desk Software
 Trouble Ticketing Software
 Mobile Help Desk


