




TL;DR: Build AI agents without coding by preparing your knowledge base, defining approved actions, setting confidence and escalation rules, testing with historical tickets, and launching on one support channel. Most of the work involves content preparation rather than setup.
We’ve all been there, trapped in a frustrating chatbot loop, shouting “agent!” at our screens. Your customers wait on hold while support agents spend time repeating the same tasks on each ticket. Frustration builds on both sides.
Imagine being able to build AI Agents that take pressure off your support team from day one. A virtual assistant that handles a high volume of common queries around the clock, helping reduce wait times and improve response consistency.
Modern AI agents in customer service make this possible. Unlike rigid, rule-based chatbots, AI agents use your approved help articles and FAQs as knowledge sources.
They connect to your tools to perform real tasks, updating orders, resetting passwords, and more.
So, how do you build an AI agent that actually works? This guide explains how to build AI customer service agents without writing code.
Why support teams are building AI agents
AI agents are taking on a larger share of customer service work. Beyond answering common questions, they can retrieve information, complete routine tasks, and escalate requests that require human judgment.
In Salesforce’s 2025 survey of 6,500 service professionals, teams estimated that AI handled 30% of service cases and expected that figure to reach 50% by 2027.
However, implementation is not simply a matter of switching on a feature. Teams need clear use cases, reliable content, and well-defined escalation rules before deployment.
They also need to test performance carefully and improve the agent before expanding it to more support workflows.
Gartner found that, among service leaders who identified self-service as a priority, 51% also considered it a significant challenge.
Interviews highlighted problems such as organizational resistance and disorganized data.
The practical lesson is simple: begin with a narrow use case, reliable source content, and clear escalation rules. Expand only after the agent performs consistently.
What you need before building an AI support agent
Before building AI agents, make sure the right content, processes, and ownership are already in place.
Preparing these prerequisites upfront can improve answer quality, simplify testing, and reduce issues after deployment.
| Prerequisite | What should be ready |
| Initial use case | One clearly defined request type with a measurable outcome |
| Knowledge sources | Up-to-date KB articles, Q&As, webpages, or files containing authoritative answers |
| Historical tickets | A representative set of resolved conversations for testing and validation |
| Scope boundaries | Topics the agent can handle and those it must decline or escalate |
| Human handover | A destination team and clearly defined escalation conditions |
| Agent owner | A person responsible for content, testing, maintenance, and performance reviews |
| Baseline metrics | Current ticket volume, resolution rate, escalation rate, CSAT, and cost per resolution |
| Administrative access | Permission to manage AI agents, knowledge sources, channels, and actions |
| Action requirements | A list of systems the agent needs to read from, write to, or interact with |
| Security requirements | Rules for identity verification, personal data handling, approvals, and restricted topics |
Audit your AI knowledge base before connecting it. Remove conflicting instructions, outdated policies, and duplicate answers. An agent cannot reliably resolve questions when its approved sources disagree.
How to build AI agents without coding
A no-code AI agent builder allows support administrators to configure and deploy an AI agent through a visual interface instead of writing code.
Without coding, administrators can typically:
- Connect supported knowledge sources, including KB articles, Q&As, webpages, and files.
- Define the agent’s instructions, tone, language, and response boundaries.
- Set confidence thresholds and rules for transferring requests to human agents.
- Test conversations, publish the agent, and monitor its performance through built-in tools.
No-code does not mean that every use case requires zero technical support.
An administrator or developer may still be needed when the agent must retrieve protected account information, update records, complete transactions, or connect to custom systems through APIs, authentication, or an MCP server.
The distinction is straightforward: knowledge-based answers and standard configuration can usually be handled without coding, while actions involving external systems may require technical setup.
Steps to build AI agents with BoldDesk
Building an AI agent no longer requires extensive engineering resources or complex development work.
With a no-code AI agent builder like BoldDesk, support teams can create AI agents that answer customer questions, perform approved actions, and escalate complex requests when needed.
Here is a practical roadmap for building AI customer service agents with BoldDesk.

Step 1: Choose a use case and define success metrics
Before you create AI agents, decide exactly what they should do.
Start with a single support scenario, such as billing inquiries, password resets, order tracking, account management, and product FAQs.
Define:
- The questions the agent should handle
- The topics it should escalate
- The requests it should not handle
- The expected support volume
- The desired outcome
- How success will be measured
It’s also important to establish baseline metrics before deployment and set realistic performance targets. This will help you measure the agent’s impact over time.
Common success metrics include deflection rate, escalation rate, unanswered questions, and average resolution time.
Step 2: Prepare the agent’s knowledge sources
An AI agent is only as effective as the information available to it.
Before adding knowledge sources to your AI agent, review them carefully.
Update outdated content, correct any inaccuracies, fill knowledge gaps, and look for questions that customers often struggle to find answers to.
Focus on authoritative and trusted sources, such as verified KB articles, approved documentation, product guides, and internal support resources.
Review historical tickets to identify questions customers frequently ask that your current knowledge sources do not answer. These content gaps should be addressed before deployment.
Finally, assign content ownership so information remains accurate and up to date over time.
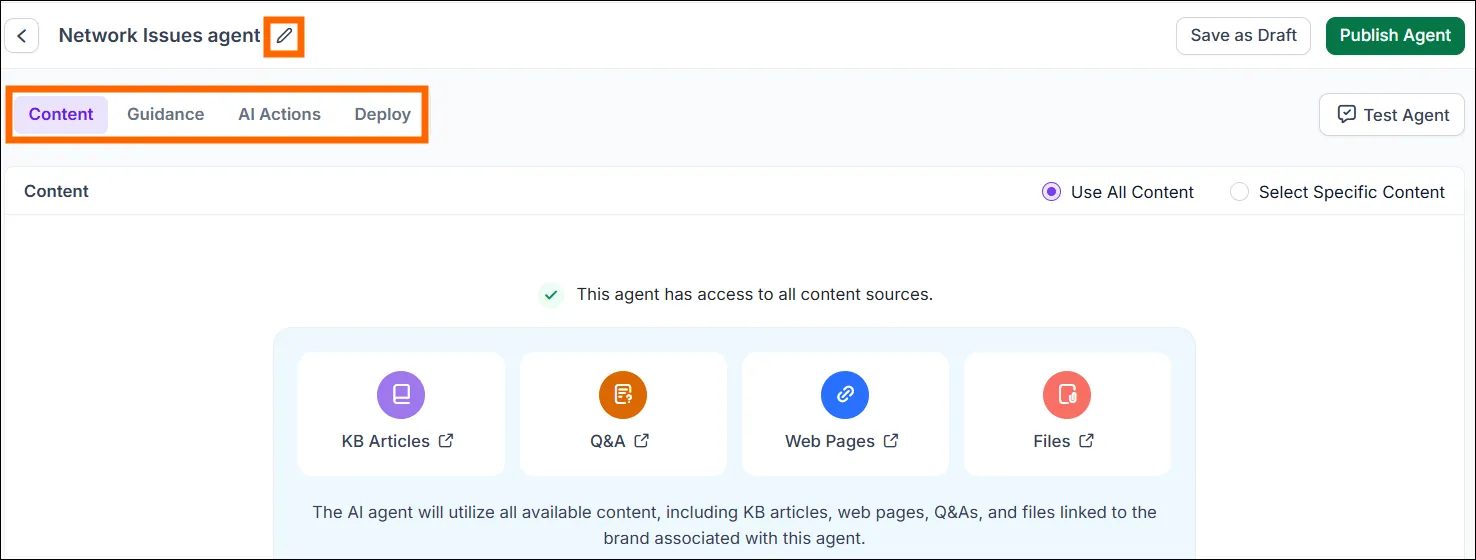
Step 3: Create and configure the AI agent
Follow these steps to create AI agents in BoldDesk:
- Go to the AI module and select Create Agent.
- Name your agent. Choose something descriptive like Billing Agent or Support Assistant.
- During setup, provide the agent name, display name, avatar, description, and brand.
- Define the agent’s role, instructions, and the types of questions it should handle.
For example, configure it as a billing assistant that answers subscription questions, explains invoices, and escalates refund exceptions to a human agent.
Refer to this video to learn how you can quickly get started with BoldDesk’s AI agent.
For a detailed step-by-step workflow, read our guide on creating and configuring an AI Agent in BoldDesk.
Step 4: Connect tools and restrict permissions
To make your AI customer service agent more than just a chatbot, you can add AI Actions. These allow the agent to perform approved tasks, such as checking order status, updating records, or sending confirmations.
Here’s how to configure an AI Action:
- Go to the AI Actions section in Admin and click Create Action.
- Choose the action type (API or MCP Server) and select whether it will be triggered by the AI Agent or AI Copilot.
- Define the information the action needs, such as an order ID, customer ID, or email address.
- Connect the action to your system through an API endpoint and map the response so the agent knows how to respond.
- Define what should happen if an action fails, such as notifying the customer, retrying the request, or escalating the conversation to a human agent.
- Test the action in the AI Actions playground.
It’s also important to control what your AI agent can and cannot do.
Only grant the permissions needed for the task, and consider adding authentication, validation checks, or approval steps for sensitive actions such as account updates, subscription changes, or refunds.
Refer to this video to learn more about AI agents in BoldDesk.
For example:
A growing SaaS startup can use an AI Action to streamline subscription change requests. When a customer submits a request such as “Cancel my subscription,” the AI agent can collect the required information, verify the account, and initiate the appropriate billing workflow.
Depending on your organization’s policies, the request may require additional validation or human approval before the change is completed and a confirmation is sent.
Step 5: Configure guardrails and human handover
AI agents should not attempt to handle every situation. Before deployment, define clear boundaries for sensitive customer data, financial requests, unsupported topics, policy exceptions, and other high-risk actions.
When configuring your AI agent:
- Define the topics it should and should not handle.
- Identify requests that require human review, such as billing disputes, account ownership issues, or policy exceptions.
- Restrict high-risk actions based on your organization’s security and compliance requirements.
- Define rules for handling personally identifiable information (PII), financial requests, unsupported topics, and other high-risk interactions.
- Configure how the agent should respond when it cannot confidently complete a request.
You should also configure both handover options:
- Immediate handover: Transfers the conversation directly to a human agent when predefined situations occur.
- Conditional handover: Transfers the conversation when specific conditions are met, such as low confidence, unsupported requests, failed validation checks, or policy restrictions.
Human handover must be configured explicitly. It does not occur automatically after a fixed number of failed responses.
Review historical support tickets to identify the types of requests that regularly require human assistance, then use those scenarios to guide your handover and escalation rules.
Step 6: Test with historical support tickets
Before deploying your AI agent, test it using historical tickets from the chosen use case.
Create a test set that includes common questions, edge cases, escalation scenarios, and requests that should trigger AI Actions.
For each test, define the expected outcome before running it. Then compare the actual result to determine whether the agent responded correctly, selected the right action, or escalated when appropriate.
Beyond checking whether the agent returns the correct answer, you should also verify that it follows guardrails, selects the right actions, handles failures appropriately, and escalates when required.
The table below outlines key testing categories to review before deployment.
| Test category | What to check |
| Correct answer | The response agrees with the authoritative source |
| Grounding | The agent does not invent details absent from its sources |
| Scope | Out-of-scope requests are declined or transferred |
| Handover | The correct team receives the context needed to continue |
| Action selection | The intended tool runs only when its conditions are met |
| Permission control | The agent cannot access or change unauthorized data |
| Failure handling | Timeouts and unsuccessful actions are reported accurately |
| Multi-intent request | The agent identifies when a message contains more than one issue |
| Sensitive request | Identity, financial, and personal-data rules are applied |
| Channel behavior | Formatting and handover work in the intended channel |
After testing, calculate the test pass rate using the formula:
Test pass rate = Tests producing the expected outcome ÷ Total tests × 100
Review any failed responses, identify the cause, update the agent’s knowledge, instructions, actions, or guardrails, and retest until performance is acceptable for the specific use case.
Step 7: Launch on one channel and monitor
Before launch, define a rollback plan that outlines when the pilot should be paused, who will review issues, and how conversations will be routed to human agents if performance falls below expectations.
Publish it and start with a limited rollout. Rather than deploying across every channel at once, begin with a single channel, such as your website widget or live chat, and monitor its performance closely.
For the initial pilot, define:
- The channel where the agent will be available.
- The use cases it should handle.
- The customer group or traffic volume included in the rollout.
- The criteria for expanding or pausing deployment.
During the first few days and weeks, monitor key performance metrics, including deflection rate, escalation rate, unanswered questions, daily credit consumption, and total credits used.
Review conversations, customer feedback, and escalated requests regularly to identify content gaps, inaccurate responses, or workflow issues. Update knowledge sources, instructions, and actions as needed before expanding deployment.
Still unsure how to build an AI agent? Our always-on support team is here to guide you step by step.
Get Expert Help
How to manage multiple AI agents
As your support operation grows, you may need multiple AI agents for different functions, such as billing, technical support, onboarding, or customer success.
To manage multiple AI agent systems effectively:
- Assign each agent a specific role and a clearly defined scope.
- Use separate knowledge sources, instructions, and actions for each support area.
- Route conversations to the most appropriate agent based on customer intent, channel, or workflow.
- Test agents independently to ensure accurate responses and handovers.
- Monitor performance metrics such as deflection rate, escalation rate, unanswered questions, and customer satisfaction.
- Regularly review and update each agent’s knowledge sources, guardrails, and actions.
Building AI customer service agents that shape the future
Building AI agents starts with defining a clear use case, preparing reliable knowledge sources, and configuring the agent’s role and instructions.
From there, connect approved actions, set guardrails and handover rules, test with historical tickets, and launch on a single channel before expanding to additional use cases.
With the right AI agent builder like BoldDesk and ongoing monitoring, AI agents can help support teams automate common requests, improve consistency, and scale customer support more efficiently.
Ready to build AI agents for your support team? Start a 15-day free trial to explore BoldDesk AI Agents in action.
Have questions about building AI agents or want to share your experience? Leave a comment below and join the conversation.
Related articles
- 8 Practical Ways to Use Generative AI in Customer Service
- How Agentic AI is Transforming Customer Experience in 2026
- Autonomous AI Agents: A Smart Way to Deliver Excellent Support
FAQs about building AI agents
The cost of building AI agents typically includes an eligible help desk plan or AI add-on, AI credits or usage charges, knowledge-base preparation, API or MCP integration work, and the time required for testing and administration.
Ongoing costs may also include content maintenance, performance monitoring, and updates to ensure the agent continues to deliver accurate and reliable support.
The time required to build an AI support agent depends on the complexity of your use case, the quality and availability of your knowledge sources, and the level of customization needed.
With BoldDesk AI Agent, a basic support agent can typically be set up in a few minutes by connecting your existing knowledge base, help center articles, or FAQs.
For more advanced implementations involving custom workflows, integrations, or extensive training content, the setup may take several days to a few hours.
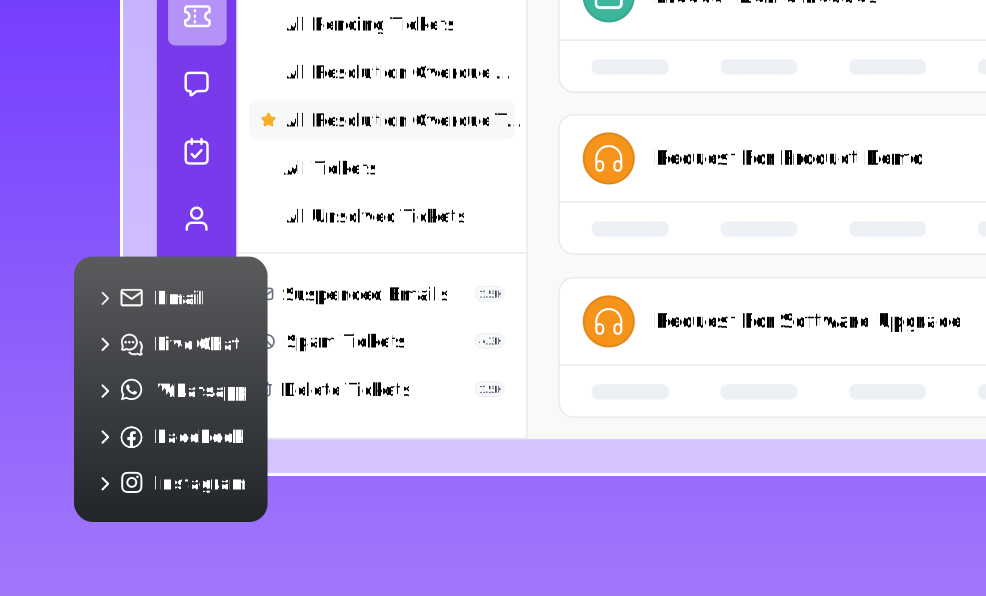
BoldDesk AI Agents can support customer interactions across chat, email, messaging, and voice.
Channel availability and configuration may depend on your BoldDesk plan and setup, so confirm the supported channels before deployment.
Approval should involve the support owner, knowledge or content owner, and anyone responsible for systems the agent can access.
Security, compliance, or legal review may also be necessary when the agent handles sensitive data, financial requests, or regulated workflows.
There is no universal number. Build a representative test set covering common questions, edge cases, multi-intent requests, action failures, sensitive requests, and required handovers.
Launch only when the agent meets the defined acceptance criteria for every critical category.